
Introduction
The ::after selector in CSS is a pseudo-element that allows you to add content to an element, without having to actually modify the HTML. This can be useful for a variety of purposes, such as adding icons or symbols, creating clearfixes, and creating background shapes or patterns. In this tutorial, we will go over the syntax and usage of the ::after selector, as well as provide examples and explanations of how it can be used in various situations.
Syntax
The syntax for using the ::after selector is as follows:
selector::after {
    property: value;
}
Here, "selector" is the element that you want to add content to, and "property" and "value" are the CSS properties and values that you want to apply to the content. See also CSS ::before selector.
Adding Content using CSS ::after Selector
The most basic use of the ::after selector is to add content to an element. The content property is used to specify the content that you want to add. Here's an example:
<a href="#">Home</a>
a::after {
    content: "➤";
    padding-left: 5px;
}
This will add an arrow icon (➤) after the text "Home" in the link, with a padding of 5px to the left of the icon. The content property accepts text, images, or other elements as its value.
Output:
See the Pen a ::after by Vinish Kapoor (@foxinfotech) on CodePen.
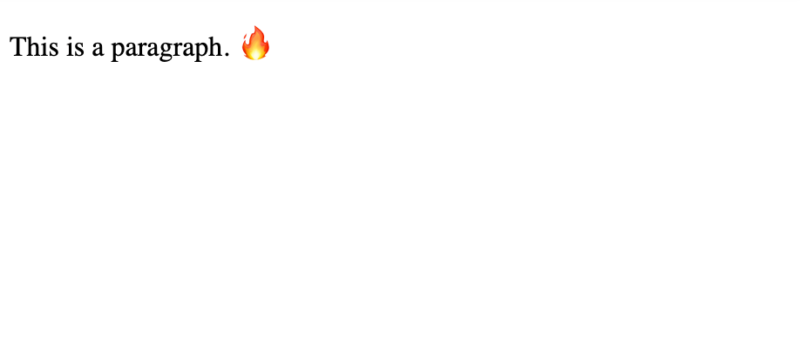
Adding Icon at the end of the Paragraph
<p>This is a paragraph.</p>
p::after {
    content: "🔥"; /* Unicode character for a flame */
    font-size: 20px; /* to adjust the size of the icon */
    padding-left: 5px; /* to add some space between the icon and the text */
}
This will add a flame icon 🔥 after the text "This is a paragraph.", with a font size of 20px and a padding of 5px to the left of the icon.
Using Unicode characters can be a great alternative to using images because they are lightweight, easy to use, and supported by most modern browsers. Additionally, it does not require additional HTTP requests to load images, which could improve the performance of your website.
Output:
Creating Clearfixes using ::after in CSS
Another common use for the ::after selector is creating clearfixes for floated elements. A clearfix is a technique used to prevent floated elements from collapsing and causing layout issues. Here's an example:
<div class="container">
    <div class="float-left">Float Left</div>
    <div class="float-right">Float Right</div>
</div>
.container::after {
content: "";
clear: both;
display: table;
}
.float-left {
float: left;
}
.float-right {
float: right;
}This will create a clearfix for the floated elements, ensuring that they do not collapse and cause layout issues. The ::after selector is used to create an empty element after the container, and the clear and display properties are used to make sure that the ::after element takes up the full width of the container and clears the floats.
Output:
See the Pen css after clear fix by Vinish Kapoor (@foxinfotech) on CodePen.
Creating Background Shapes using CSS ::after
The ::after selector can also be used to create background shapes or patterns for an element. Here's an example:
<div class="container">
    <div class="shape"></div>
</div>
.shape::before {
content: "";
width: 0;
height: 0;
border-left: 50px solid transparent;
border-right: 50px solid transparent;
border-bottom: 100px solid blue;
position: absolute;
bottom: 0;
left: 50%;
margin-left: -50px;
}This will create a blue triangle shape with a width of 100px and a height of 100px at the bottom of the "shape" div. The ::after selector is used to create an empty element after the "shape" div, and the width and height properties are set to 0 to make sure the element takes no space. The border properties are used to create the triangle shape, and the position, bottom, left, and margin-left properties are used to position the shape at the bottom center of the "shape" div.
Output
See the Pen blue triangle using after by Vinish Kapoor (@foxinfotech) on CodePen.
Limitations
The ::after selector can only be used on elements that have content, such as text or images. - Some older browsers may not support the ::after selector.
Browser Support
| Selector | Chrome | Edge | Firefox | Safari | Opera |
|---|---|---|---|---|---|
| ::after | 4.0 | 9.0 | 3.5 | 3.1 | 7.0 |
Conclusion
The ::after selector is a powerful tool in CSS that allows you to add content to elements without modifying the HTML. It can be used for a variety of purposes, such as adding icons or symbols, creating clearfixes, and creating background shapes or patterns. However, it does have some limitations, such as only working with elements that have content and not being supported by all browsers. Nevertheless, it is a useful tool to have in your CSS toolkit and can help you create more dynamic and visually interesting layouts.
FAQ
The ::after selector in CSS is a pseudo-element that allows you to add content to an element, without having to actually modify the HTML.
To use the ::after selector, you first need to identify the element that you want to add content to, and then use the syntax "selector::after" to target it. Then, you can use the "content" property to specify the content that you want to add, and other CSS properties to style or position the content.
The ::after selector has a few limitations to keep in mind. It can only be used on elements that have content, such as text or images, and it may not be supported by all browsers, particularly older ones. Additionally, it does not work on all types of elements, for example, it does not work on table elements.


