
In this tutorial, you will learn how to create a user in Oracle Apex.
A user in Oracle Apex can be an administrator, a developer, and the end user. An administrator who manages all the users and workspaces, etc. A developer who develops the application, a developer can be an administrator also and the end user is who operates the application.
To create a user, you need to create a workspace first. The following are the steps to create a workspace in Oracle Apex.
To demonstrate this I am using Oracle Apex version 19.1.
Create Workspace in Oracle Apex
- To create a workspace in Oracle Apex, you need to log in as ADMIN user. Use the following URL http://localhost:8080/apex/apex_admin (change the port number according to your server port). Specify the password you specified at the time of Installation of Apex.
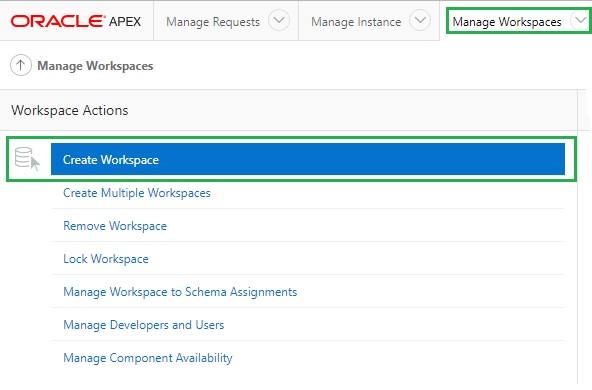
- Now click on the Manage Workspaces > Create Workspace as shown in the below image:
- In the next step, it will ask you to enter workspace name, id, and the description as shown in the below image. Specify the values accordingly:

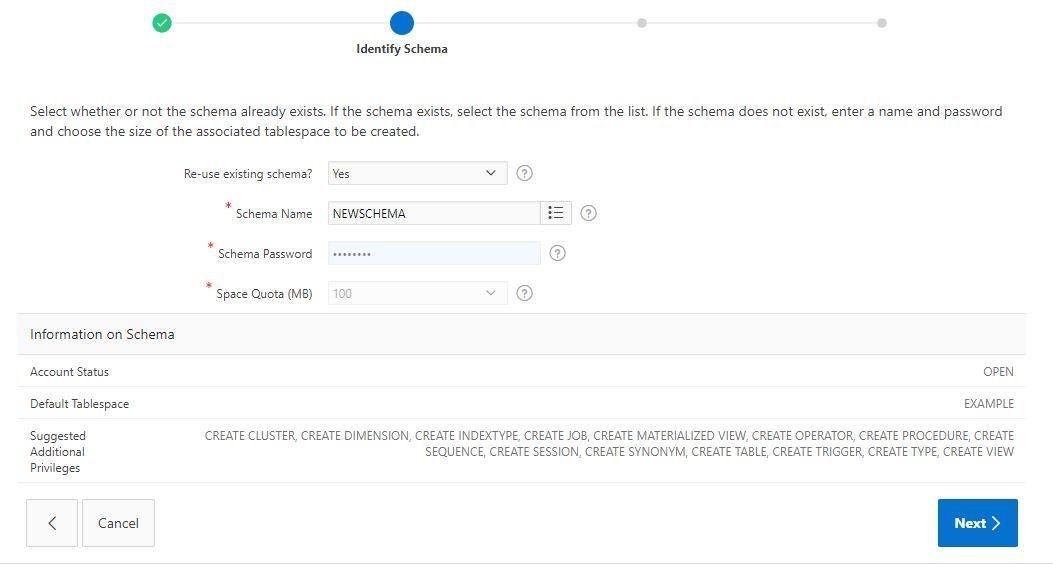
- In the next step, you will have the options to create a new schema for workspace, or you can use an existing schema. As shown in the below image:
- Now you need to specify the Administrator details for the workspace. If you have created the multiple Administrators then specify the username and password, else you can specify the default administrator details.

- Finally, it will ask you to confirm the details, click on the Create Workspace button to confirm and to create the workspace.
You have created a workspace successfully and now need to create a user, follow these steps:
Create a User in Oracle Apex
- In Oracle Apex, click on the Manage Workspaces > Manage Developers and Users. An existing list of users will be displayed. Click on the Create User button to start creating a user.
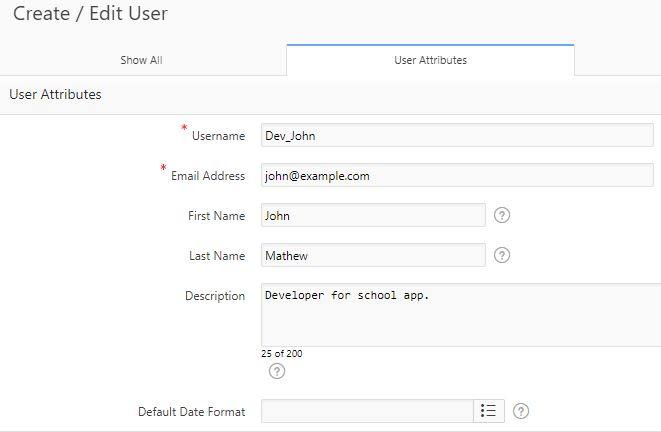
- A create user screen will open. Here you will find three sections, user attributes, account privileges and password. Start with entering the user attribute details as shown in the below image:
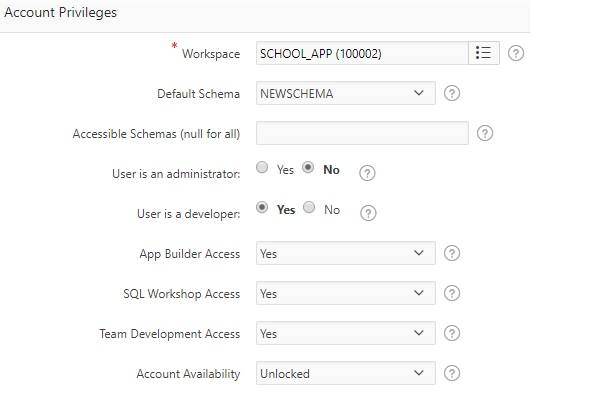
- Now specify the account privilege details by clicking on the Account Privileges tab. Specify the workspace you created, and specify the default schema you linked with the workspace. Select Yes/No values for the user type as per your requirement and assign the privileges.
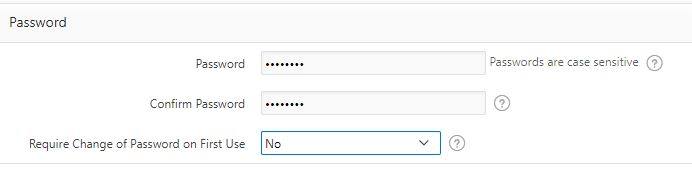
- Then click on the Password tab to specify the password for the user. Specify the password and the setting for changing the password as shown in the below example:
- Now click on the Create User button at the upper right corner to complete the user creation.


Hello,
is there any way to make user creation a automated process?
so the automated process runs like a scheduled process
Thanks